Preserves, Jams & Jellies…Strawberry 🍓 Season is upon us. Time to make those Preserves, Jams & Jellies! Here are a few tips and a few do’s and don’ts.
Use fresh, dry, and don’t use over ripen fruit. Strawberries and raspberries are best layered with the sugar and left for a couple of hours before cooking. Plums, currants, gooseberries and cherries needs to be lightly poached before the sugar is added. Pectin, which is naturally found in fruits is vital to make them set. Too much water and the jam won't set easily.
To hull the fruit, use a knife to cut a V-shape into the strawberry and remove the stem. Cut the large berries in half.
Jams and jellies are both soft, sweet spreads made from fruit, sugar, lemon juice and pectin. The difference between jam and jelly is that jam is made with fruit whereas jelly is made with the fruit juice.
Temperature: If you use a candy thermometer, cook the preserves to 221 F or 9 degrees above the boiling point. For each 1,000 feet of altitude above sea level, subtract 2 degrees.
Freezer Test: Put a few small plates in the freezer. Near the end of the cooking time, begin to test. Drop a dab of jam on an ice-cold plate. Put it back in the freezer for 2 minutes. If the preserves wrinkle a bit when gently pushed with your finger, it is done. If it is still runny and your finger runs through it, continue cooking and test again in a few minutes.
Cold Spoon Test: Put a few metal spoons in the refrigerator. Dip a cold spoon into the boiling jelly and lift it. Let it run off the spoon. When two drops converge and "sheet" off the spoon, the preserves are done.
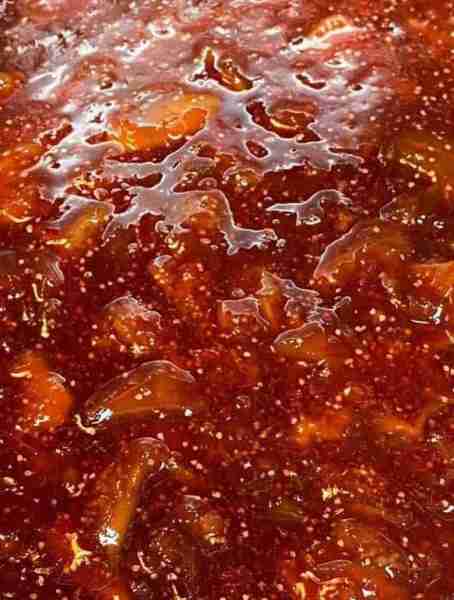
One pint of fresh strawberries weighs approximately 12 ounces. A 1-pound container, once the strawberries are hulled, will weigh about 12 to 14 ounces.
If the strawberry preserves set up properly, and you follow safe canning practices, the jars will keep for up to a year in a cool, dark place like your pantry.
If you're not sure if your preserves are properly canned, store them in the fridge and enjoy them within a month.
Be patient if the strawberry mixture is not reaching the gel point; it can take longer depending on altitude, the size of the batch, the pan size, and your stovetop. The proper temperature can't be reached until enough water has been evaporated, so if the berries have a high water content, this process will take longer. Warming the sugar beforehand can help speed things up.
Jam and preserves are made in very similar ways and have a similar flavor, but there is one major difference. Preserves are made with whole fruit, so the spread has bigger chunks of fruit than a jam, which is often made of mashed fruit for a smoother texture.
5 Steps to Easy Canning and Preserving Fruit
Step 1- Wash and cut fruit.
Step 2- Sanitize jars (leave lids face up on a clean surface).
Step 3- Cook fruit until it sets.
Step 4- Fill warm jars with hot jam.
Step 5- Close the jars and process them in a water bath.
If you're making fruit jam and skipping the canning process, which is referred to as quick jam or freezer jam. Store them in the fridge or freezer to preserve, consume them within 30 days if refrigerated and 3 months if frozen. It's not considered shelf stable without proper canning.
Substances essential for fruit jelly making are fruit flavor, pectin, sugar, an acid and water. A pectin gel or jelly forms when a certain concentration of pectin, sugar, acid, and water is achieved.
If you use a candy thermometer, cook the preserves to 221 F or 9 degrees above the boiling point. For each 1,000 feet of altitude above sea level, subtract 2 degrees.
If Doing A Freezer Test:
Put a few small plates in the freezer. Near the end of the cooking time, begin to test. Drop a dab of jam on an ice-cold plate. Put it back in the freezer for 2 minutes. If the preserves wrinkle a bit when gently pushed with your finger, it is done. If it is still runny and your finger runs through it, continue cooking and test again in a few minutes.
Cold Spoon Test:
Put a few metal spoons in the refrigerator. Dip a cold spoon into the boiling jelly and lift it. Let it run off the spoon. When two drops converge and sheet off the spoon, the preserves are done.
If the strawberry preserves set up properly, and you follow safe canning practices, the jars will keep for up to a year in a cool, dark place like your pantry.
If you're not sure if your preserves are properly canned, store them in the fridge and enjoy them within a month.
Be patient if the strawberry mixture is not reaching the gel point; it can take longer depending on your altitude, the size of the batch you’re making, the pan size you are using and your stove. The proper temperature can't be reached until enough water has been evaporated, so if the berries have a high water content, this process will take longer than usual. Warming the sugar beforehand can help speed the process up.
Jams and preserves are made in similar ways and have a similar flavor, but there is one major difference. Preserves tend to be made with whole fruit, so the spread has bigger chunks of fruit than a jam, which is often made of mashed fruit for a smoother texture.
Jelly
Step 1- Measure juice into a kettle.
Step 2- Add pectin and stir well.
Step 3- Place on high heat, stirring constantly. ...
Step 4- Add sugar, continue stirring, and heat again to a full rolling boil.
Step 5- Boil hard for 1 minute; remove from heat; skim off foam quickly.
Follow the standard canning and processing directions.
Jam
Step 1: Prep Your Fruit. Wash and dry your fruit.
Step 2: Combine Fruit and Sugar in a saucepan or pot large enough to leave several inches of space at the top.
Step 3: Simmer.
Step 4: Test for Doneness.
Step 5: Cool and Store.
Most jam recipes call for a 1:1 ratio of fruit to sugar.
No extra pectin– You may wonder if strawberry jam is better with or without pectin. Strawberries are naturally low in pectin, so some people prefer to add additional pectin to jams and jellies.
Be very careful when adding pectin. Too much will cause it to set too solid and it is not possible to rectify this so always add less than you think is necessary and test the set and then add more if needed.
Liquid pectin is added to the cooked fruit and sugar mixture immediately after it is removed from the heat. Powdered pectin is added to the unheated crushed fruit. Liquid and powder pectin cannot be interchanged in a recipe. Follow the manufacturer's recipes and instructions.
Once the jam reaches a slow, thick boil, add your lemon juice and continue to cook, stirring constantly until the jam returns to its earlier consistency, about another 5 minutes. Making jam without pectin is easy, you just have to cook it longer.
Boil it rapidly for 5-10 mins until the jam has reached 105C on a preserving or digital thermometer, then turn off the heat. If you don't have a thermometer, spoon a little jam onto one of the cold saucers. Leave for 30 secs, then push with your finger; if the jam wrinkles and doesn't flow to fill the gap, it is ready.
It’s important to avoid a few common mistakes such as listed below ⬇️ in order to achieve success.
1- Doubling the batch.
2- Reducing the sugar.
3- Omitting the lemon.
4- Not using commercial pectin if necessary.
5- Not cooking long enough.
Lemon juice is essential for getting the pectin to gel properly and setting the jam. It also helps prevent the growth of bacteria. If your recipe called for lemon juice and you forgot to put it in, your mixture will not be safe for canning. Lemons vary in ripeness and therefore the amount of acid might not be adequate for the jam to achieve the proper set. The best way to ensure you are adding enough acid is to go with a commercial bottled lemon juice because these are controlled and standardized, so the acid content is more reliable.
Do not change the sequence in which the ingredients are added. For example, powdered pectin does not dissolve in a sugared solution, so if you add the sugar and then the dry pectin, the jam will not be firm. Be sure you use a container large enough to accommodate the preserves when they are brought to a full rolling boil.
Once your jam/marmalade has reached a rapid rolling boil do not stir it. Stirring it will alter the temperature of the jam/marmalade meaning it will take longer to reach the setting point.
Coarse-grain white granulated sugar is best for jam-making as it ensures a good clear jam, but fine caster sugar can also be used. The coarse grains dissolve more slowly and evenly, giving a better result. It's important to add the sugar at the right time. If you add it too early, the sugar can cause the fruit to break down and become mushy. If added too late, the jam may not set properly.
If the fruit is wet, or over-ripe, and then frozen, this will result in runny jam.”
Corn syrup or honey can replace part of the sugar in jelly recipes. The flavor of the fruit may be altered if too much honey or corn syrup is substituted. To substitute honey or corn syrup for sugar use these amounts. For no-pectin-added jelly, Corn syrup may replace 25 percent of the sugar.
If you want to thicken it to a more spreadable consistency, the easiest way is to heat it up with some cornstarch or Arrowroot flour. Arrowroot flour is more taste-neutral, but most cooks won't have it. Unflavored gelatin may also be used. Bring the syrupy “jam” to boil in a pot.
No need to skim while the jam/jelly cooks. Wait until you take it off the heat and let it sit in the pot for about 2 minutes. This is long enough for the scum to start hardening a bit and is easily removed with a spoon.
Adding butter to help prevent foam. As you heat the fruit, the proteins open up into strands that get tangled up and help stabilize the bubbles into a foam. Adding butter helps prevent the tangling. The butter prevents the jam from foaming while you're cooking it. The foam is unattractive and spoils the appearance of the jam. Adding a little butter eliminates this.
#canning #jams #jellies #tamishomeandpantry #preserves